Invoices
Creating an invoice using the 100Pay Dashboard is a straightforward process that can streamline your billing operations. This guide will walk you through the steps to efficiently generate professional invoices for your clients or customers.
Prerequisites
Before we dive into the process of creating an invoice, please ensure that you have completed the following prerequisites:
- Create a 100Pay Account: If you haven't already, sign up for a 100Pay account. Visit the official 100Pay website and follow the registration process.
- Log In to Your Account: Ensure you are logged into your 100Pay account. You should be on the main dashboard after logging in.
Once you have confirmed these steps, you'll be ready to proceed with creating your invoice using the 100Pay Dashboard.
How to create a Payment Link?
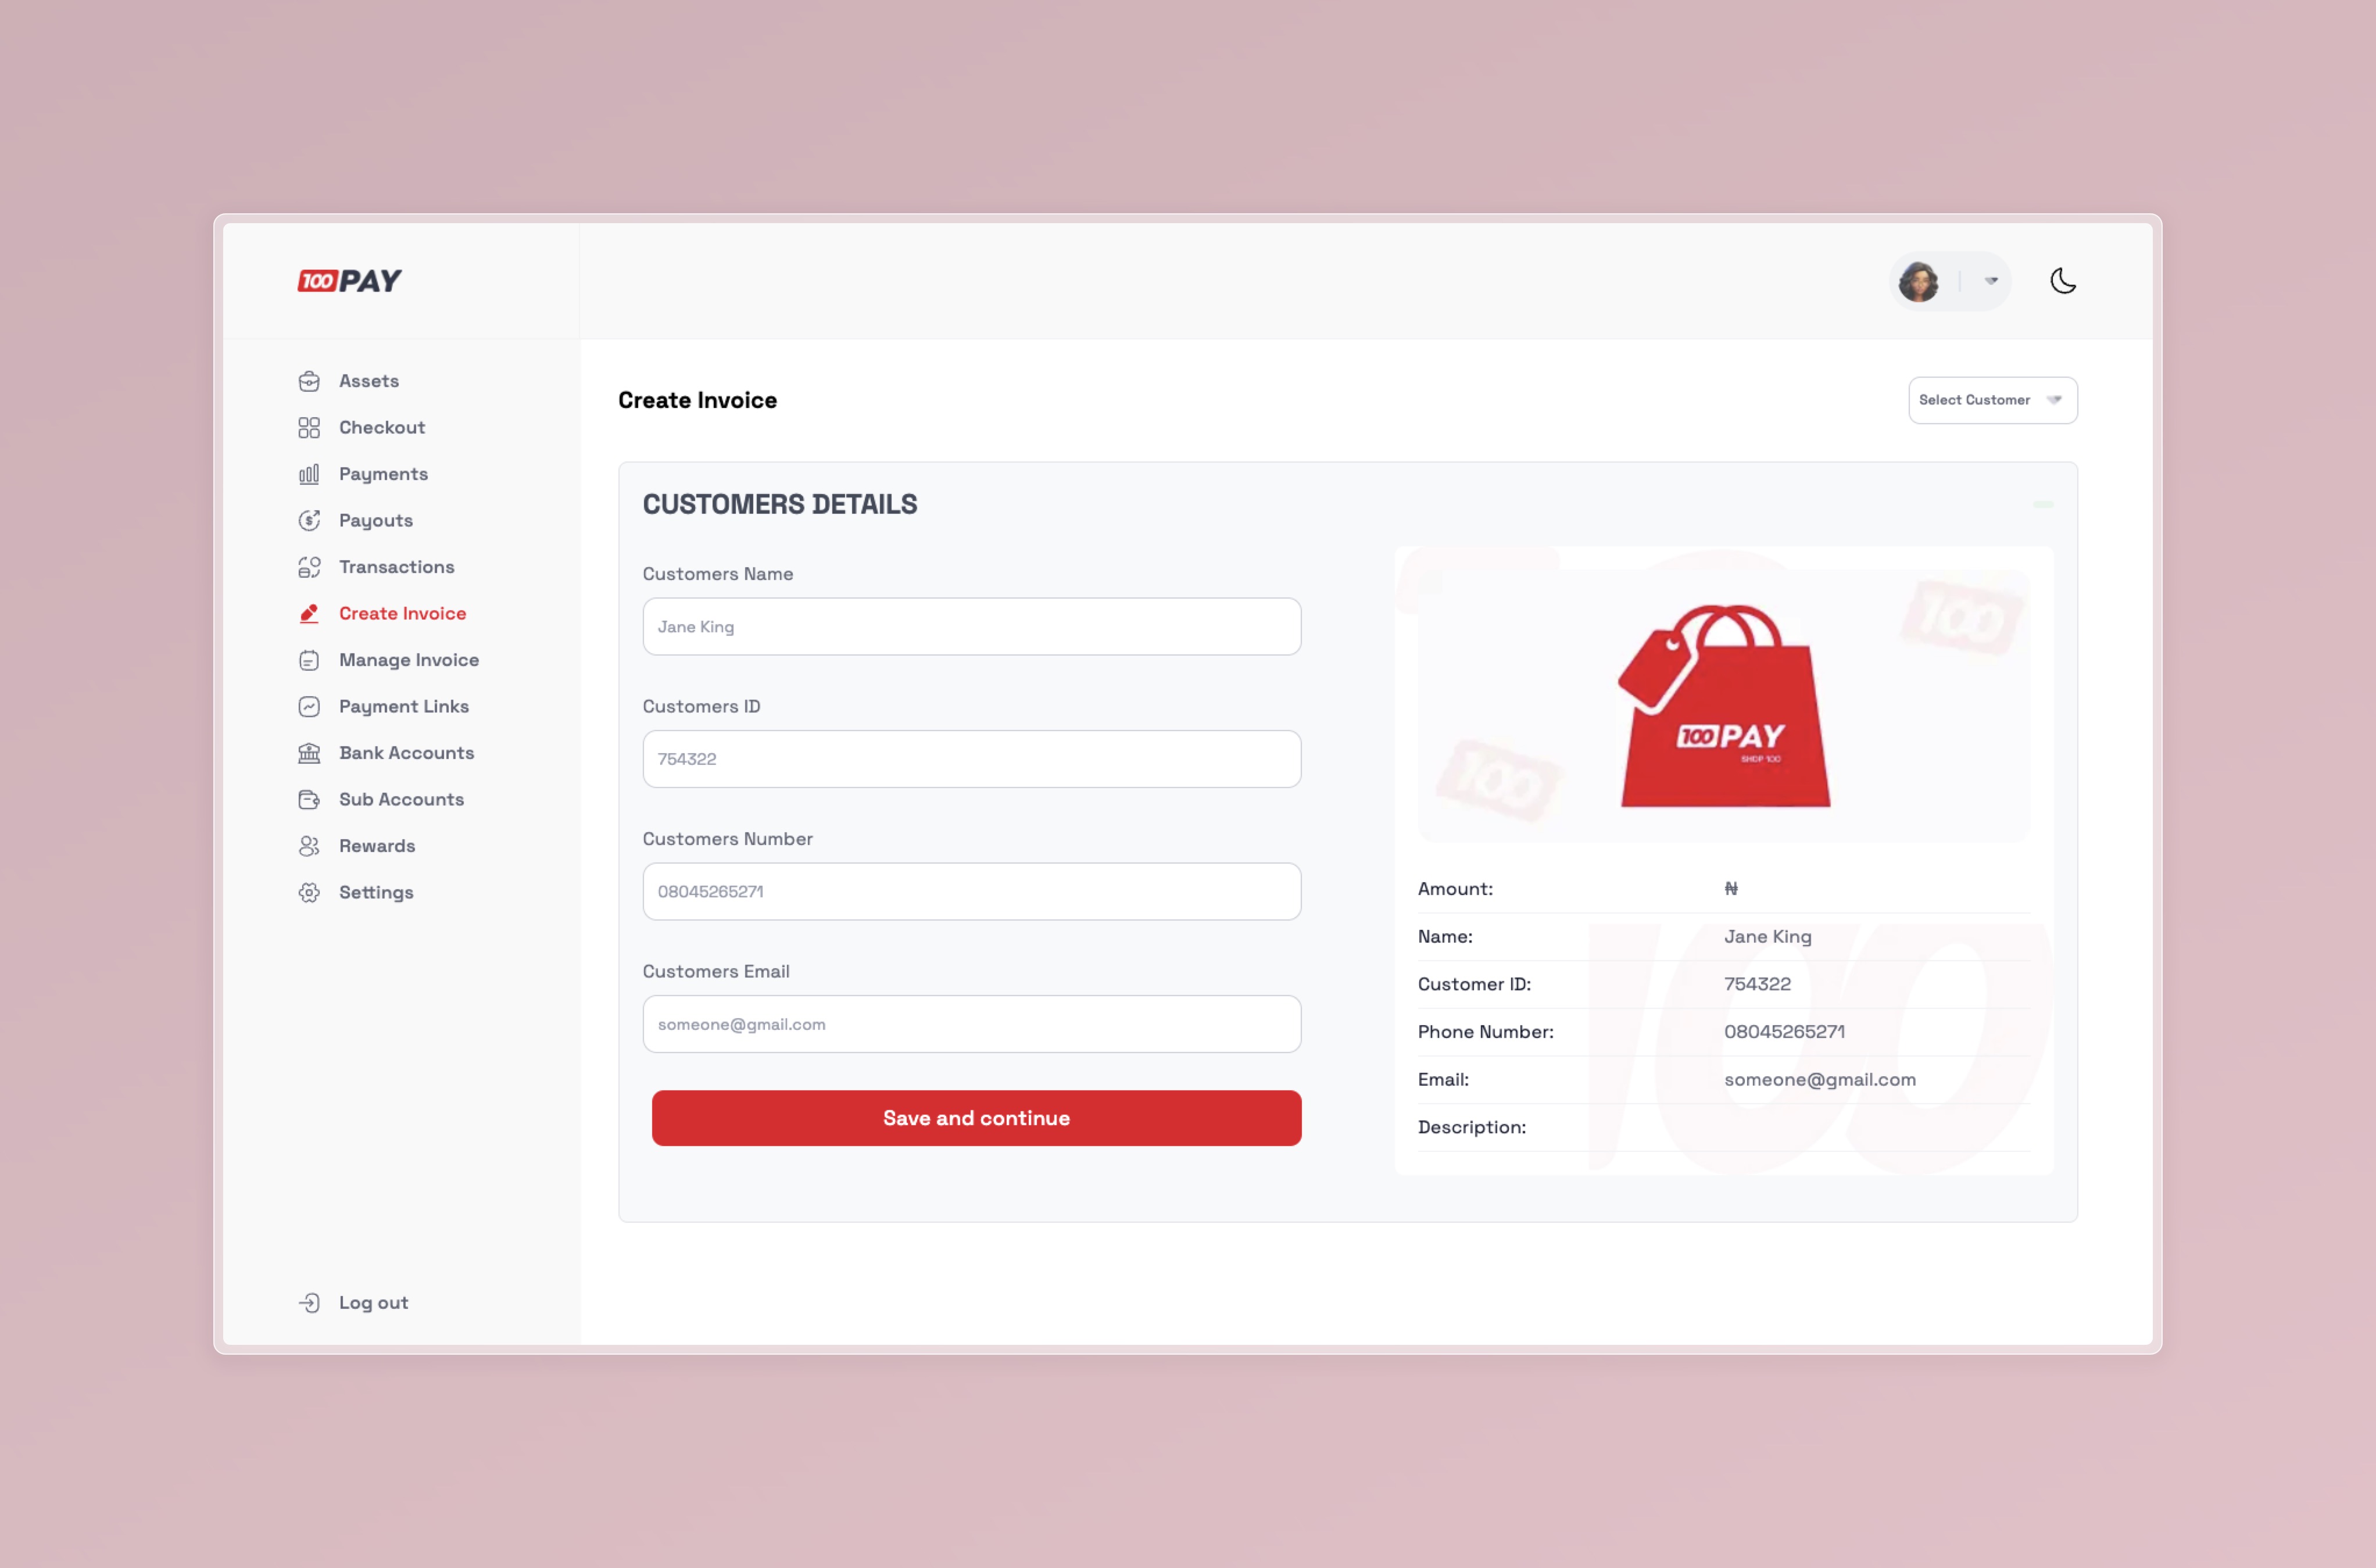
- Navigate to the create invoice page, fill in the customer details to create a customer.

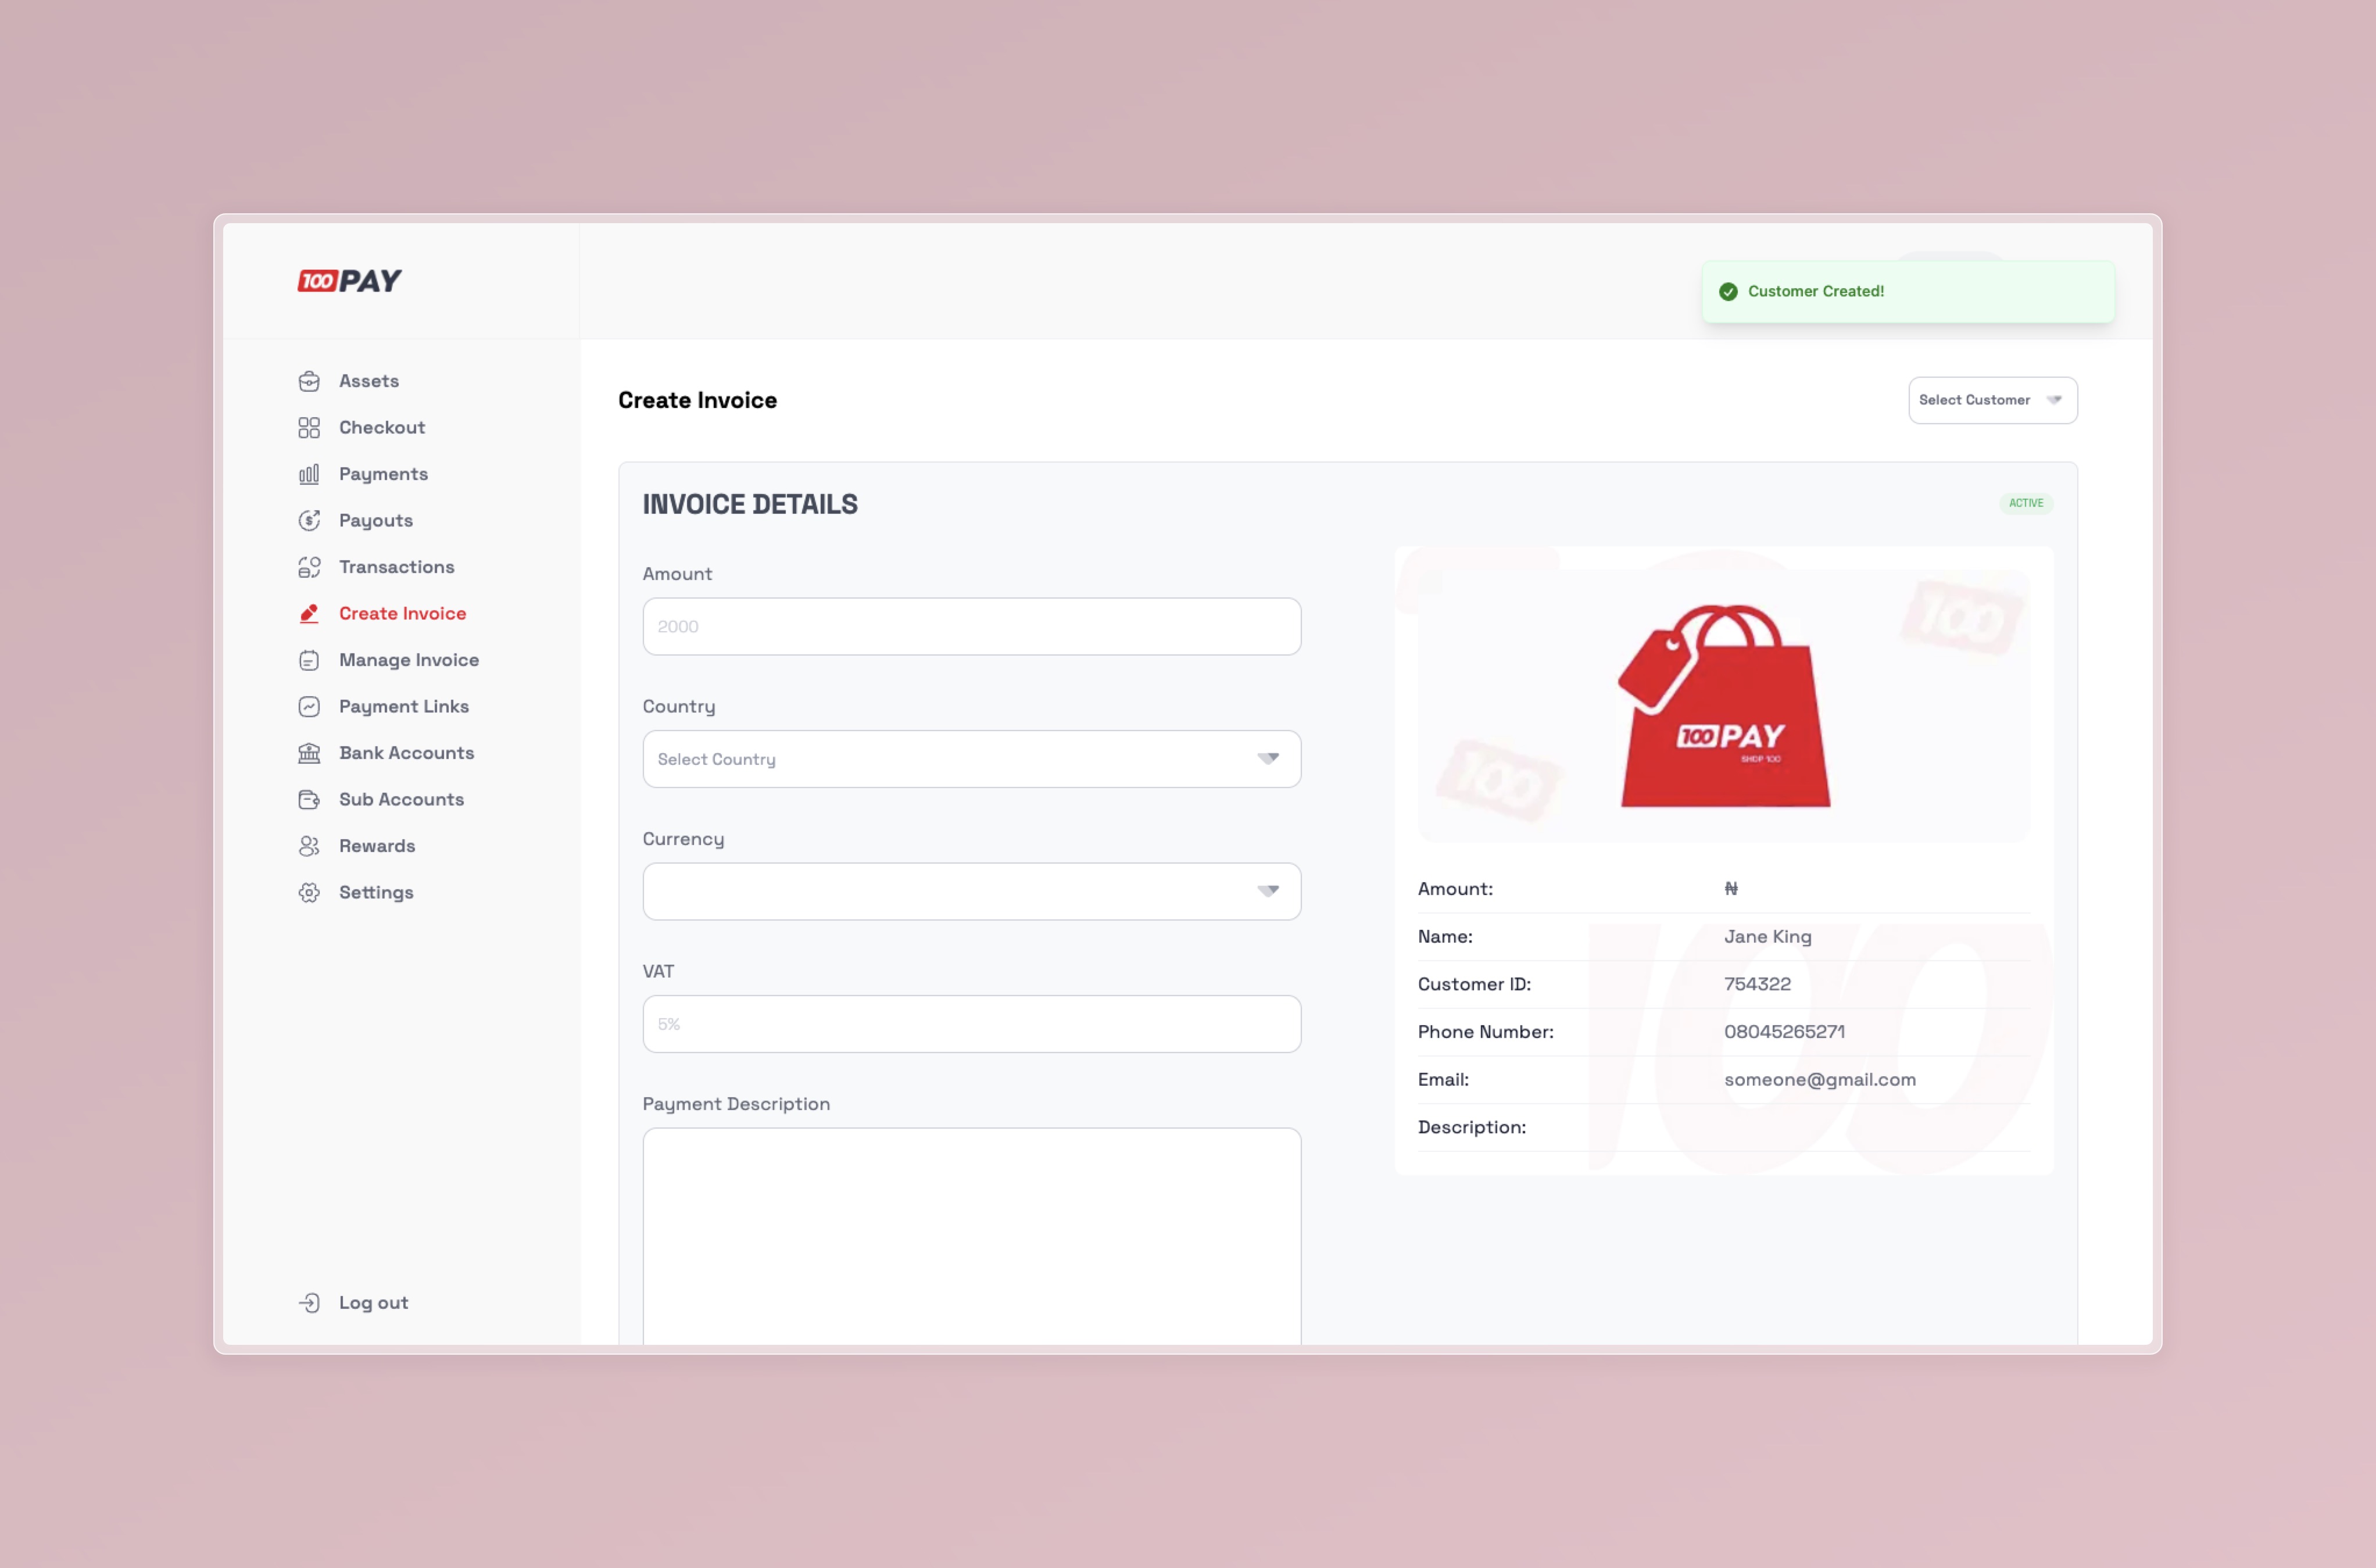
- Next, you'll move on to the invoice section where you can enter all the necessary customer invoice details. Once everything is filled out, you can proceed to generate the final invoice.

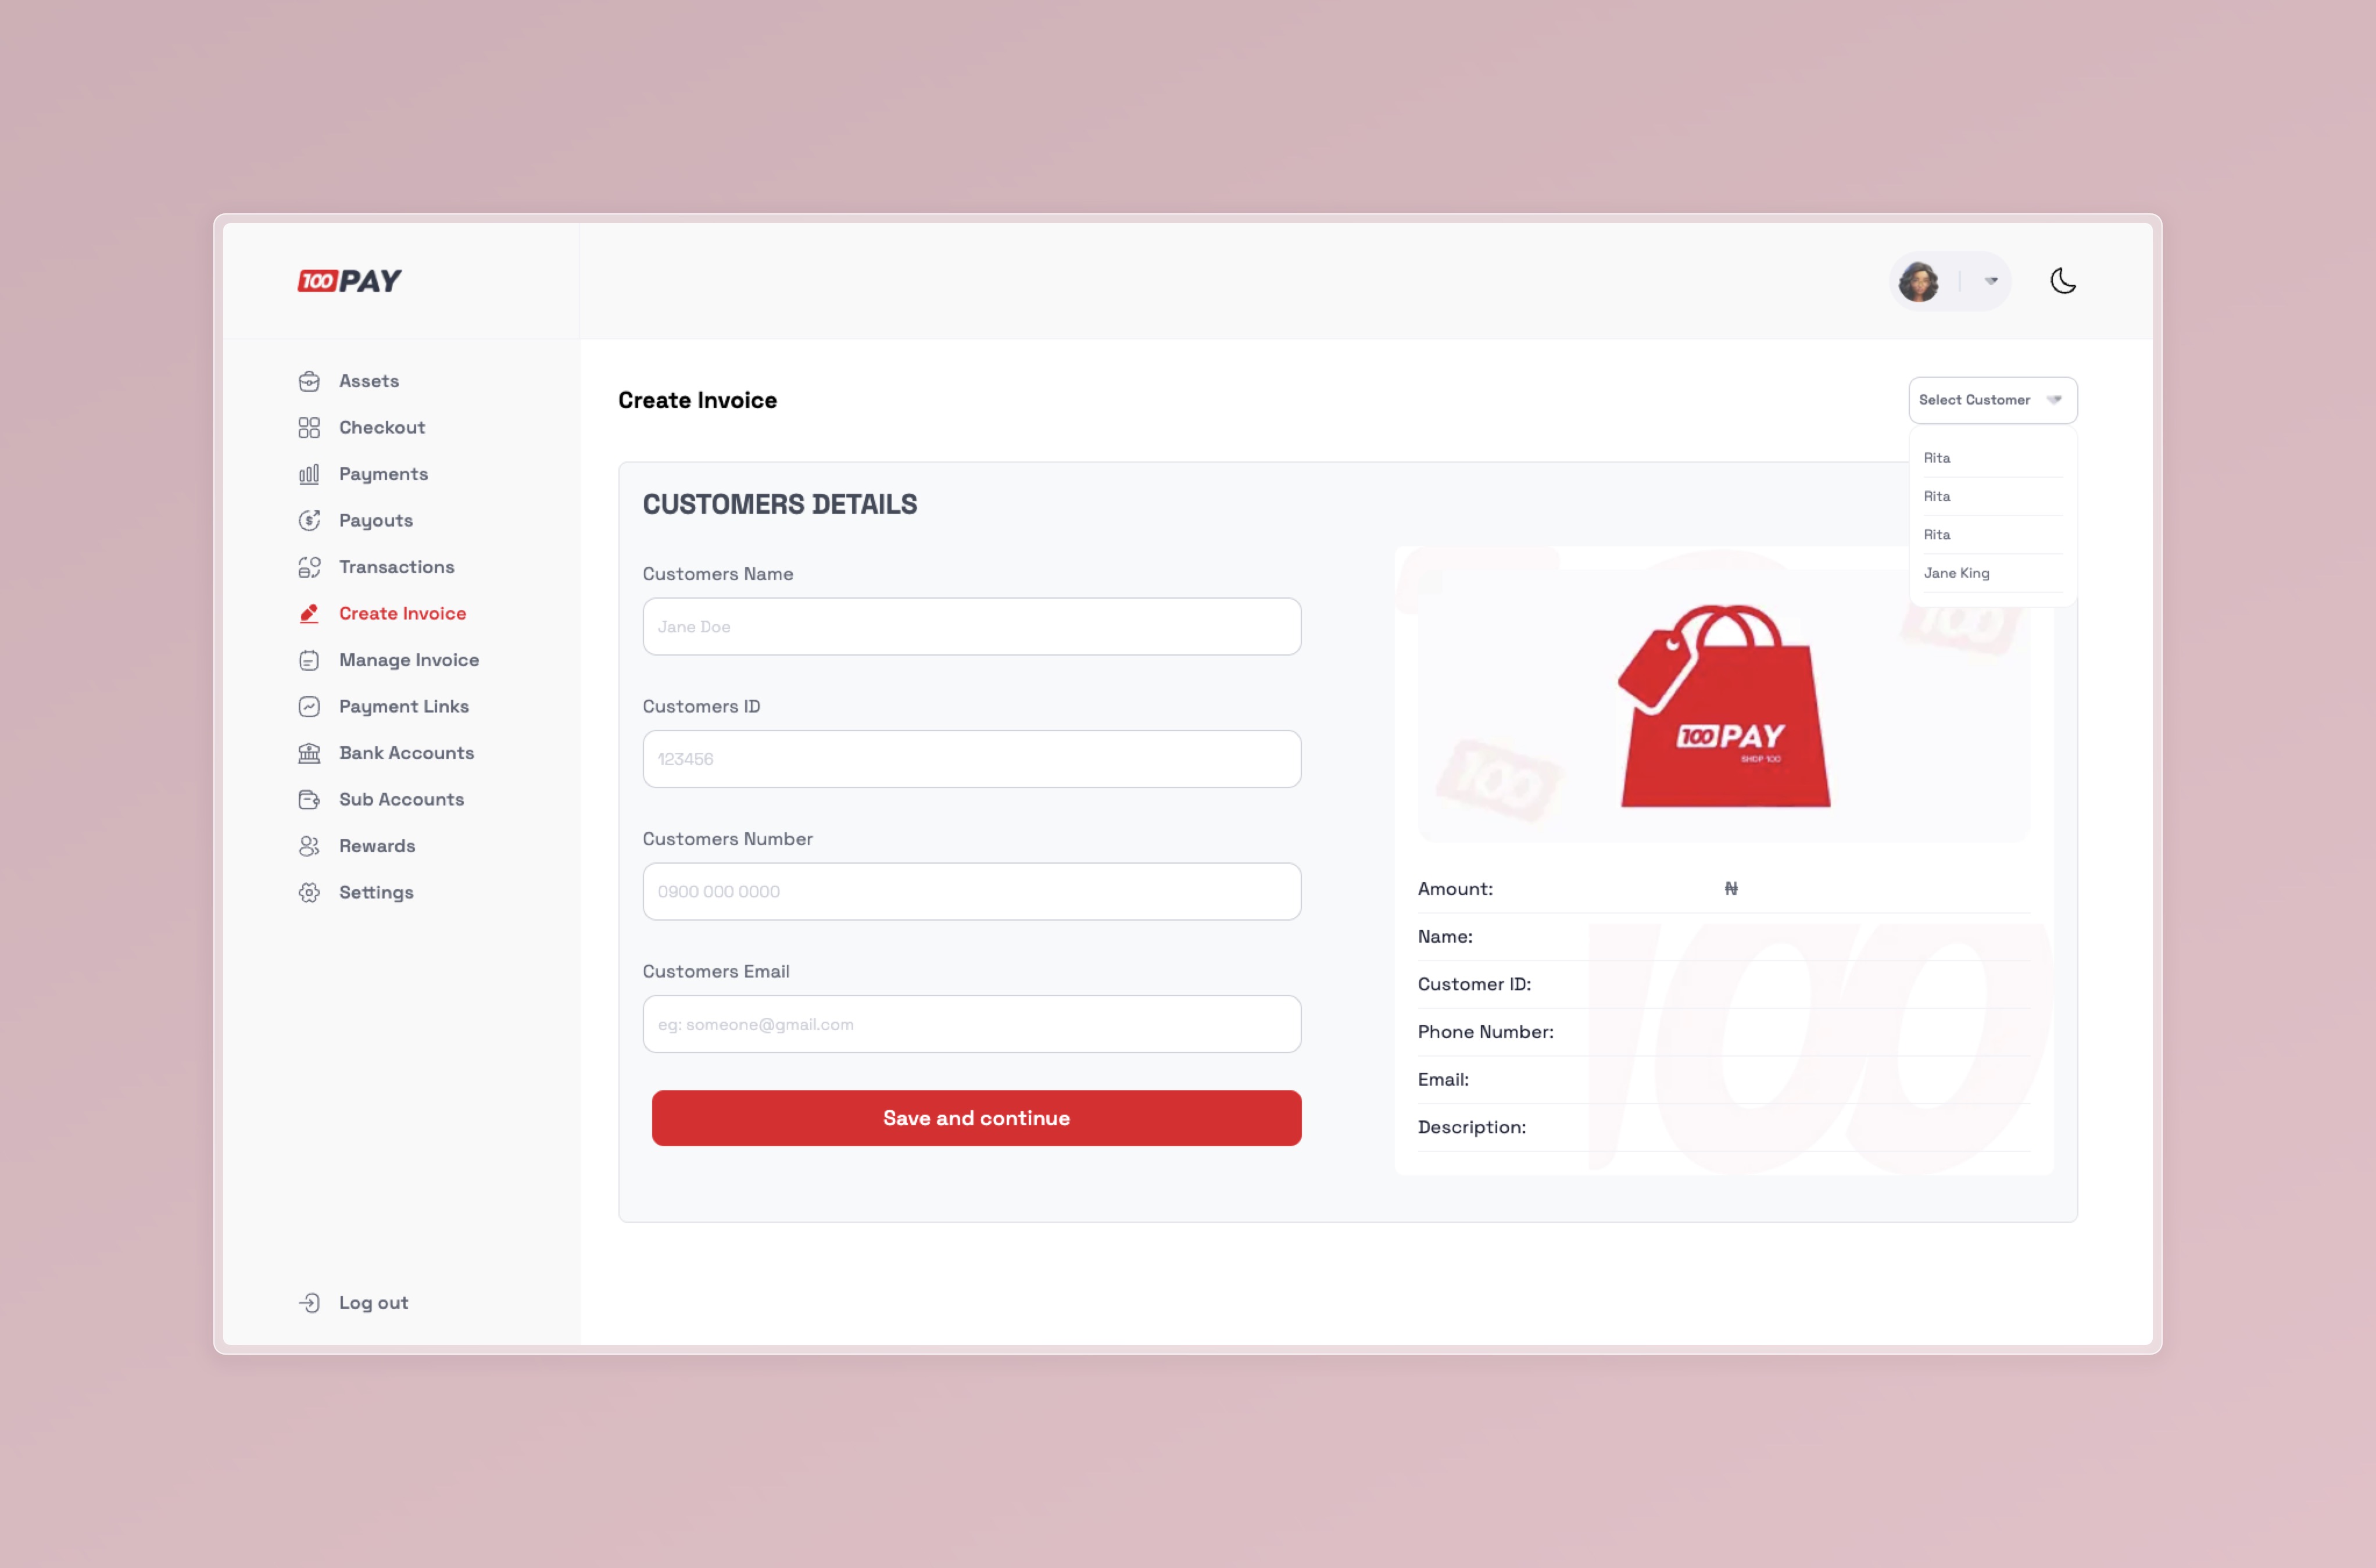
If you already have a customer created, you can select the customer using the button at the top right of the create invoice page. This will automatically take you to the invoice details section, allowing you to proceed smoothly with filling in the necessary information.

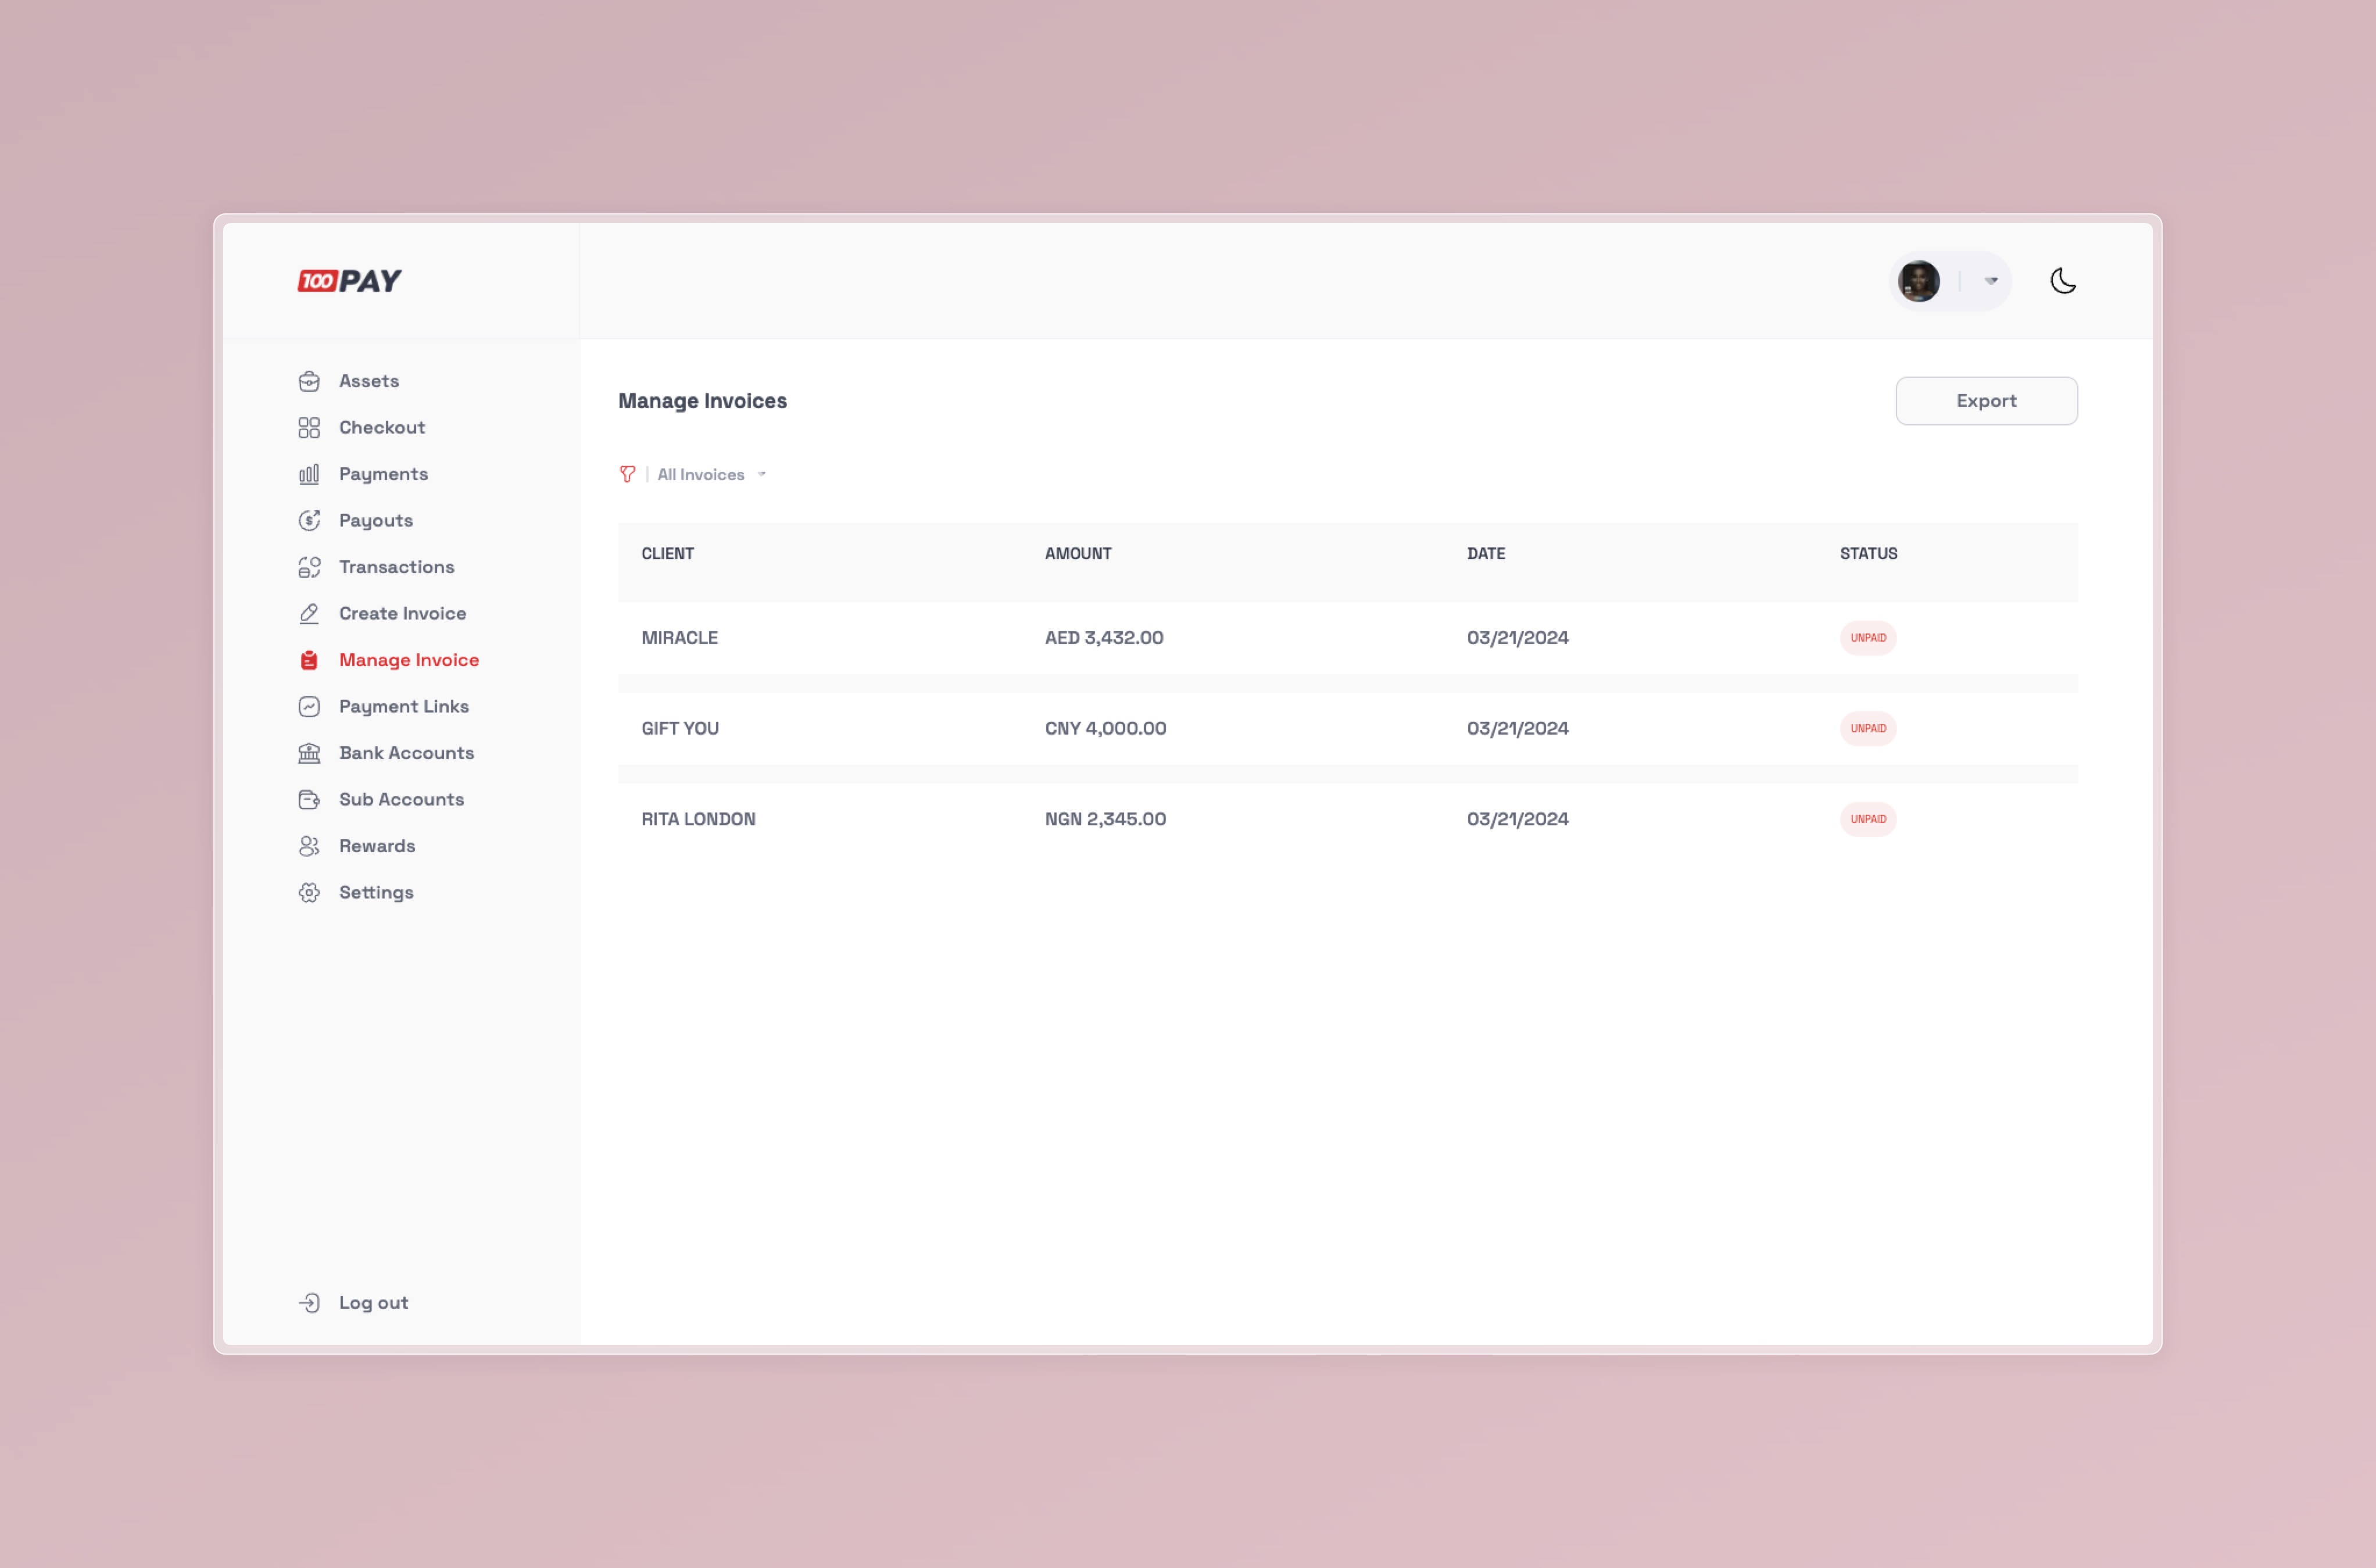
- Now, you’ll proceed to the manage invoice page, where you can view all the invoices you’ve created and download their corresponding receipts.

- Share Receipts with your customers 😉.
![Invoice Receipt](https://res.cloudinary.com/de0mfrbre/image/upload/v1726225466/100Pay___Simplifying_Digital_Payments_-_100pay_12.04pm_09-13_husajg.jpg